Hey there folks!
Welcome back to the Java Series! In this lesson, we’ll learn about JDK, IDEs, ways to install them and write our first Java program.
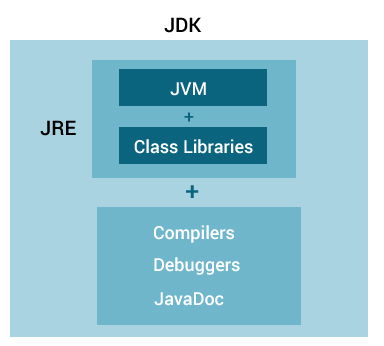
In the previous lesson, we learned all about Java Virtual Machine i.e., JVM and how it works. The environment which provides the JVM is called Java Run Environment (JRE).
Along with the JVM, it contains other libraries and files used by JVM during runtime.

Note that JRE only helps in running java programs. SO if you want to run a Java program you will have to install JRE.
JRE is, in turn, a part of an environment called JDK which helps in developing Java applications. So if you plan to develop Java programs and do Java programming in general, you might wanna install JDK.
What is JDK? What’s its use and how do you use it?
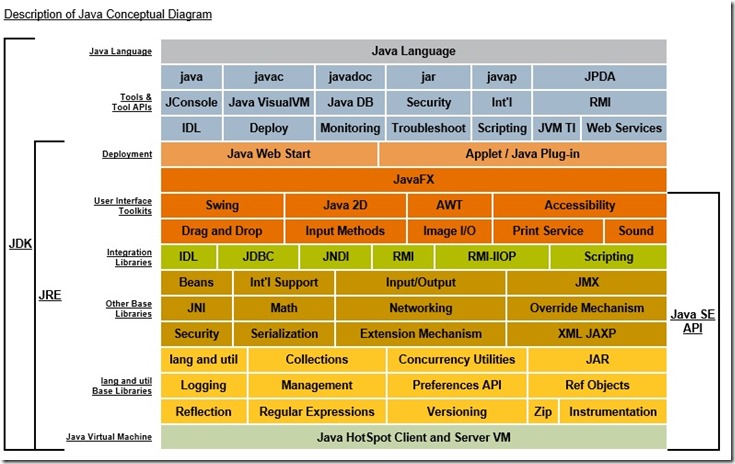
JDK which stands for Java Development Kit is a development environment which is used to develop Java applications and applets. JDK contains JRE, compilers (javac), interpreter/loaders (java), archiver (jar) and documentation generator which are required to develop applications.
If you wish to program from the command prompt, then the two JDK tools used are java and javac. So you first write a text file with a .java extension. This file is then compiled using javac. After compilation, we get a .class file. After the bytecode files are generated we can run the programs using the java command.
If you do not prefer the command prompt way of programming, you can use an integrated development environment (IDE).
An IDE or integrated development environment is software development tool which bundles basic tools required for writing and testing programs. It usually has a code editor, compiler, debugger, and a graphical user interface (GUI). Most of them usually come up with features like color-based organization, source-code formatting, error diagnostics, and intelligent code completion.
Some popular IDE tools are Eclipse, Netbeans and Visual Studio Code. These are usually easier to use as you just have to write down the code and just with a click your programs compiles and executes, compared to the command prompt way, where you have to compile the file first and then run.
Installation
To develop a Java program, you first need to install the JDK. You can download the JDK from the link given below.
It has downloads for all operating systems so you can choose your OS (Linux, MacOS or Windows), accept the license agreement and you’re good to go. 🙂
If you wish to use the command prompt for compiling and running the programs, then you just need to install JDK. But in case you’re going for an IDE, you can go for either Eclipse, Visual Studio Code or Netbeans.
All the IDE are pretty much similar except the fact that in Netbeans, you’ll have a GUI which allows you to use TextFields, Labels, and other components just by dragging and dropping it in the panel. So you wouldn’t have to implement Swings as you’ll already be provided with it. It also comes up with SQL support and JDBC drivers in case you want to connect your application to a database.
I’d prefer Eclipse for a beginner, as you’ll be able to implement Swings and other stuff and build them from scratch. The links to download them are below
Your first Java Program- A Hello World program.
After you’ve done installing, you’re ready to program in Java! Hurray! 😀
Command Prompt
If you’re using the command prompt, then here’s how you’ll write your first program.
Open a text editor of your choice (I prefer Sublime Text), and create a HelloWorld.java file.
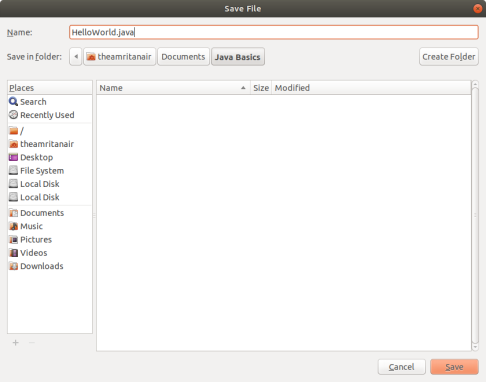
After creating the file and saving it, write down the following piece of code.
public class HelloWorld{
public static void main(String[] args) {
System.out.println(“Hello World”);
}
}
Let me explain to you what we’re doing here.
public class HelloWorld{
We first create a class named HelloWorld. If you’ve noticed it is the same as our file name. Well, that’s right. Whenever you create a Java class, it should match the file name.
public static void main(String[] args) {
This is our main method. This is the entry point of our Java program. You cannot run a Java program without a main method in it. The String[] args is nothing but arguments you can pass in the command line running the program.
System.out.println(“Hello World”);
This line is used to print a statement in a new line. If you wanna print a statement you enclose them in the quotation marks. If you wanna print a variable you simply pass the variable.
Let’s try compiling the program. (Don’t forget to save the file before compiling.
Open Command Prompt( if you’re using Windows) or terminal (if you’re on Linux), and go to the location where the file is saved. In my case, I’ve saved them in a folder in the Desktop called Java Basics.
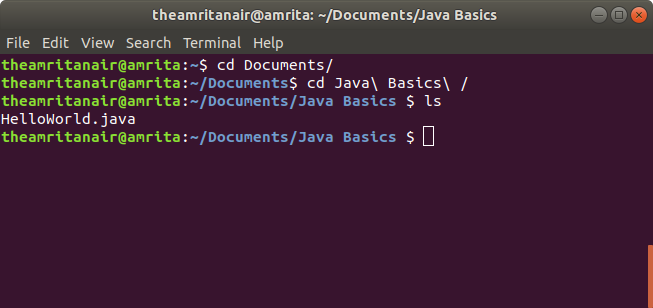
As you can see the HelloWorld.java file there. Now compile the file by giving the command.
javac HelloWorld.java
If your program has any errors, it will notify you as an error. If not, you are good to run the file.
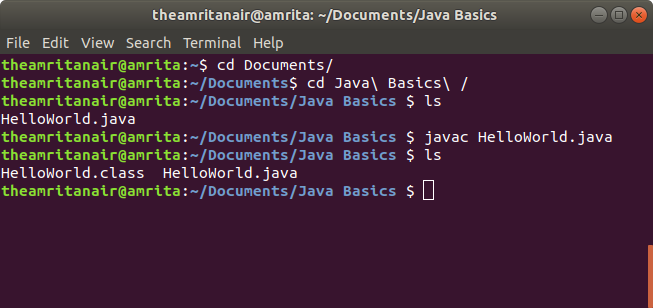
As you see, after compiling a .class file has been created.
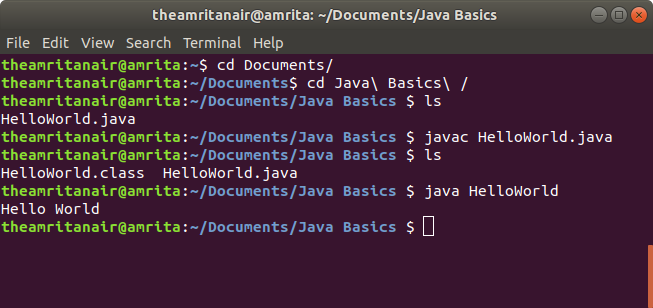
Now, you can run the file by giving the following command
java HelloWorld
And always remembering, while running the file you just mention the file name and not the extension. After running the program, it should look something like this.
IDE
I’m gonna show it in Eclipse, but the rules apply the same for all other IDEs.
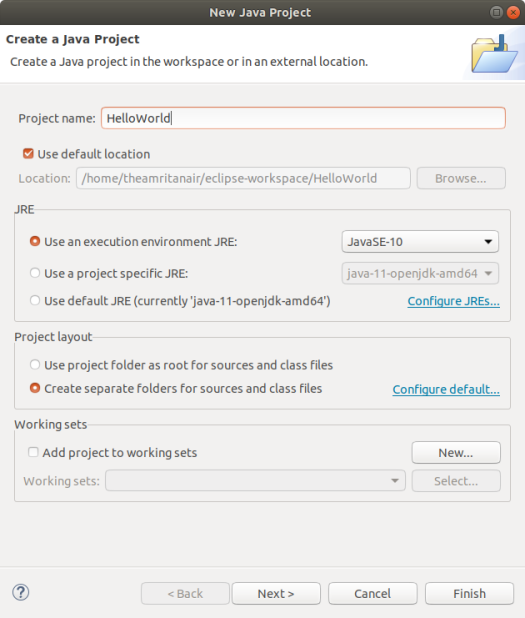
Go to File -> New -> Java Project. I’ve created a project named Hello World.
Then in the package explorer on the left side, you can the project name HelloWorld (or whatever you have named it)
Right click on the project name and then New -> Java Class. Save it as HelloWorld. Then this screen would appear.
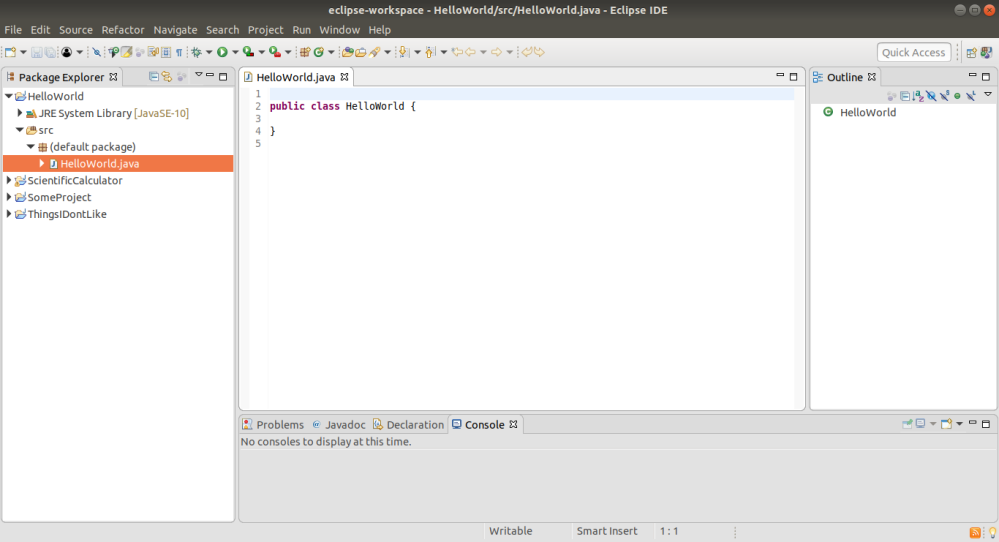
The place in the center is where you write the code. The console in the bottom shows the output.
Now in the editor, write down
public static void main(String[] args) {
System.out.println(“Hello World”);
}
And then save it. It should look something like this.
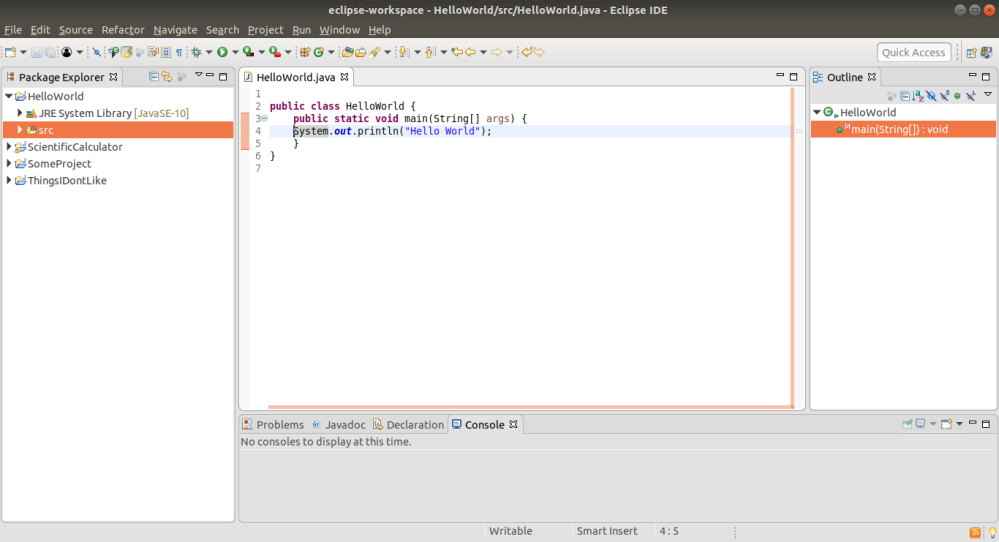
Notice on the right you can see the methods in the Outline section.
Now click on the green play button on the top, to run the file.
Your console should appear like this-
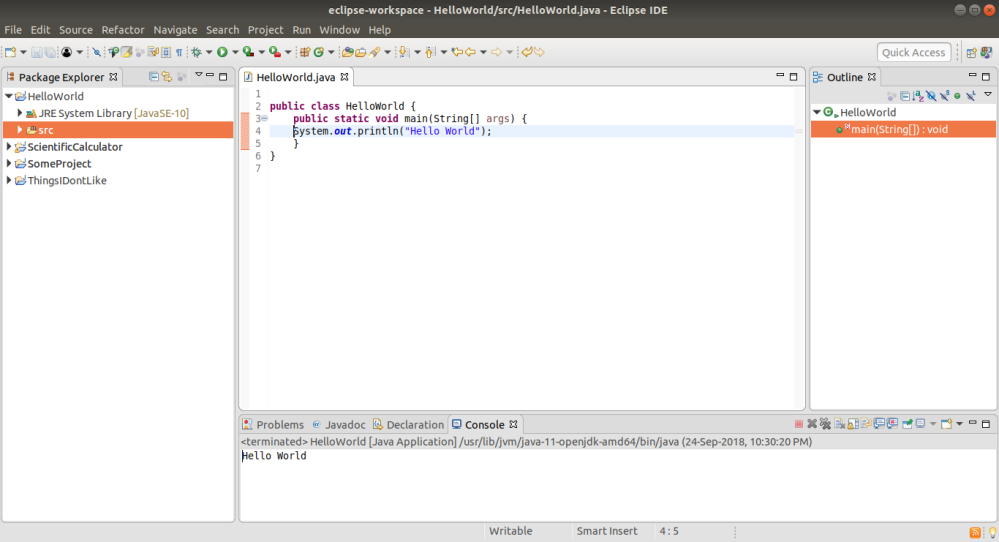
And that’s it. That’s your first Java program. Hoorayyy!

Hope this lesson helped you. If you have any issues or doubts, please comment down below. 🙂
In the lesson, we’ll learn about control loops, switches, and other topics.
Until then, see ya 🙂

Wowwwwwwwwwwwwwwwwwwwwwwwwwwwwwwww!!!!!!!!!!!!!!!!!!!!!!!!!!!!!!!!!!!!!!!!!!!!!!!!!!!!!!!!!!!!!!
LikeLike